A Fork in the Road
Creating pathways in Goblins of Elderstone
Goblins of Elderstone is primarily a village simulation game, and one of the interesting technical challenges in bringing the village to life is pathing. Not just traditional pathfinding (although that’s a big part of it), but also constructing walkways and bridges to bind buildings into a cohesive network that goblins can easily traverse to go about their daily business. The picture below gives some idea of the overall effect that the designer wanted to create:
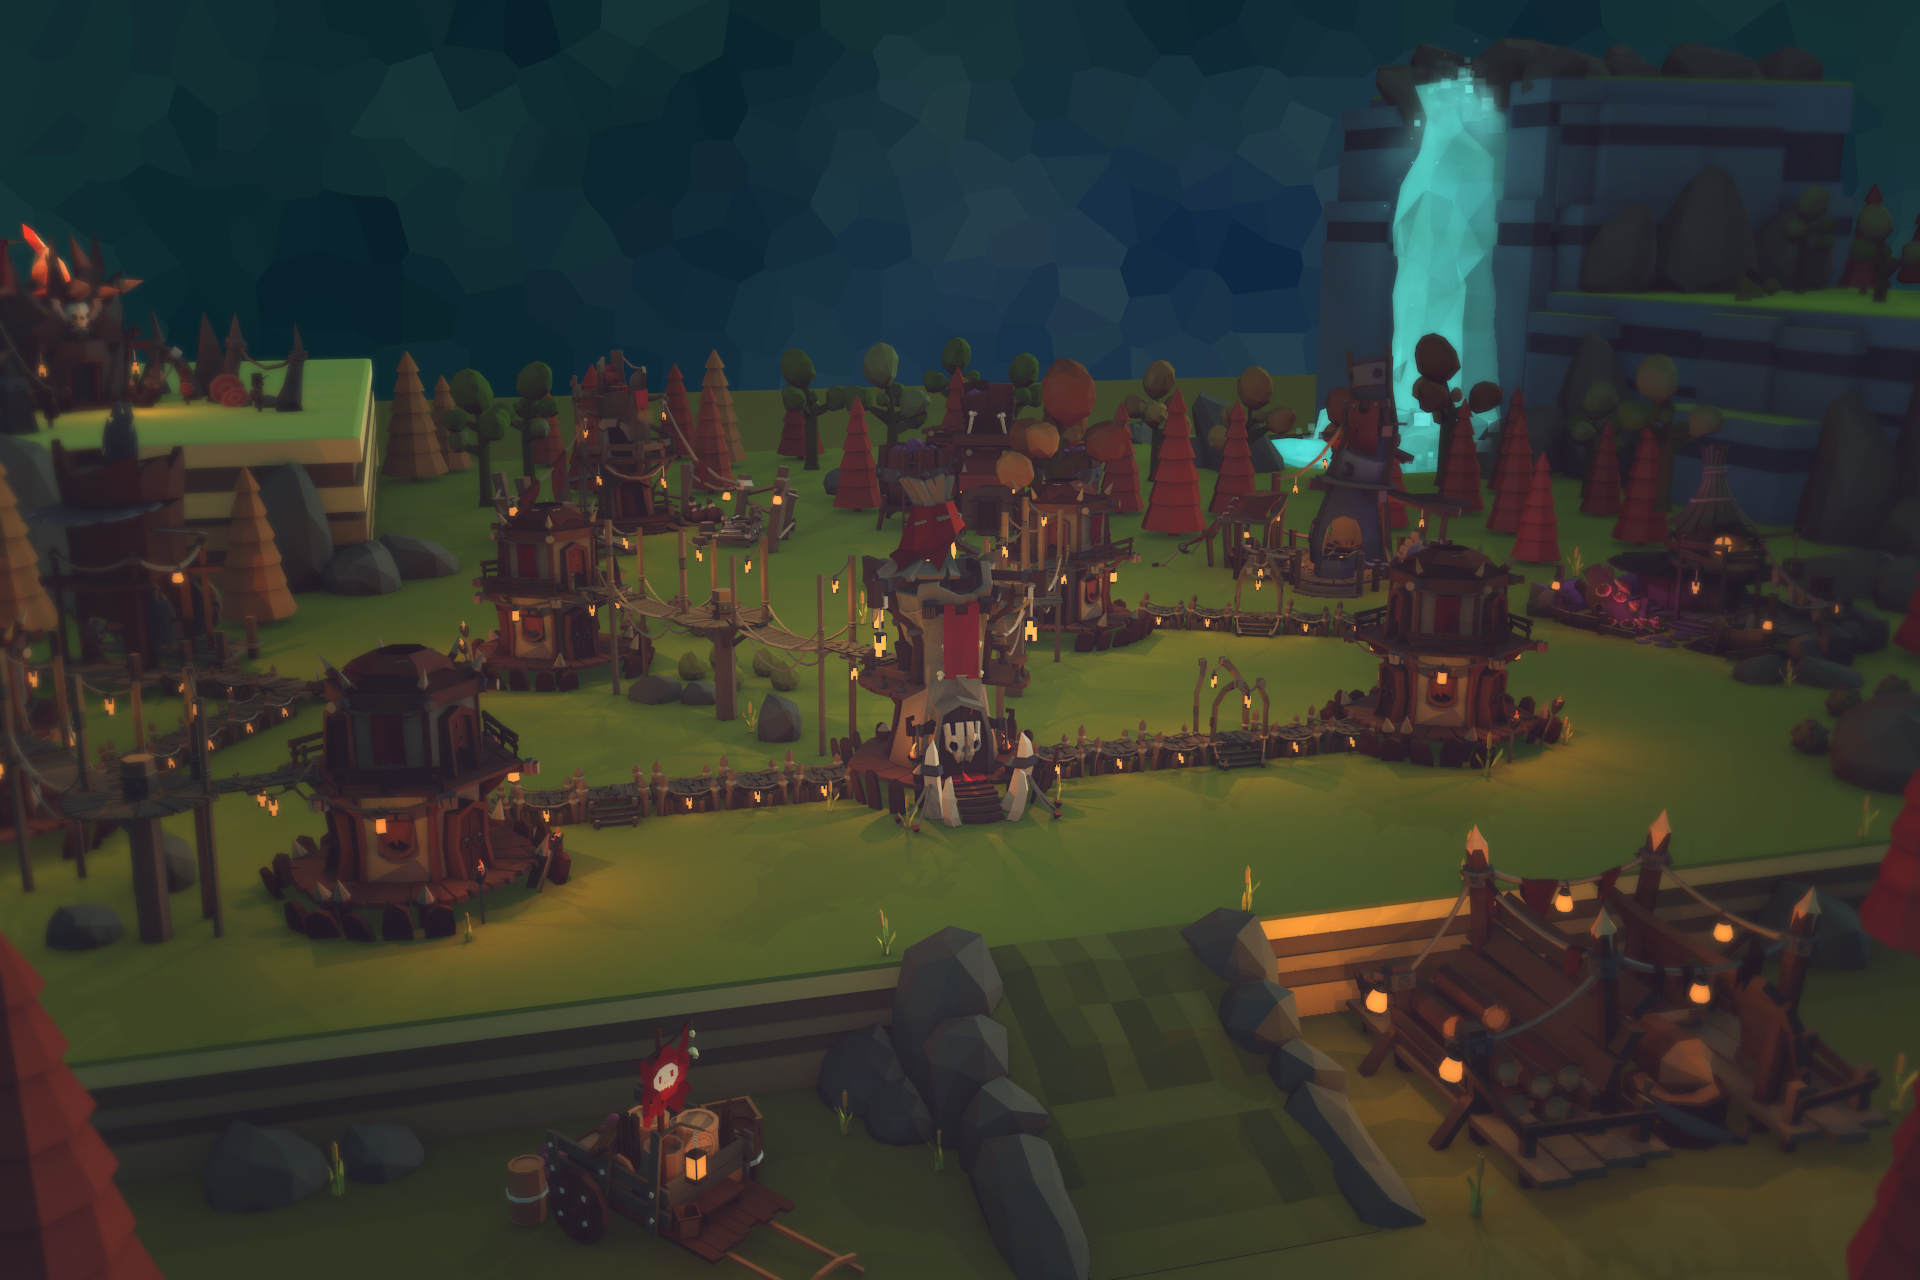
Goblin village pathing mockup
The pathing system must accomplish a number of things. First, it has to connect each new building in the village to one or more neighbouring buildings. Second, it has to create paths that either route around or travel over obstacles in the level such as rocks or trees. Third, it has to be able to accommodate changes in ground elevation with features such as stairs, ladders and bridges. And last but not least, it has to look cool!
This post will give a little bit of info about how the pathing system has been created to date, and how it uses some of the Unreal Engine systems to achieve the goals stated above.
Nodes and Endpoints
When the player places a new building in the village, we need to figure out how to connect that building with a pathway of some kind to existing nearby buildings. After some experimentation, we settled on a system that uses PathNode components in conjunction with an overall PathManager. The PathNode component automatically registers its existence with the PathManager in its BeginPlay() method, and conversely unregisters on EndPlay(). The PathManager is responsible for keeping track of live nodes and how they connect to each other, and is able to forge new path connections upon request.
Each building is set up as an Actor Blueprint containing a PathNode component, which in turn has one or more PathEndpoint components that indicate where paths can connect to and from the building. Both PathNode and PathEndpoint are subclassed from USceneComponent – this allows us to position endpoints in the Editor at locations that suit the design of each building. One nice aspect of this component-based design is that we can potentially add PathNodes to other types of Actor in the future – for example, a junction point in a path could have its own PathNode component, thus allowing paths to fork and join.
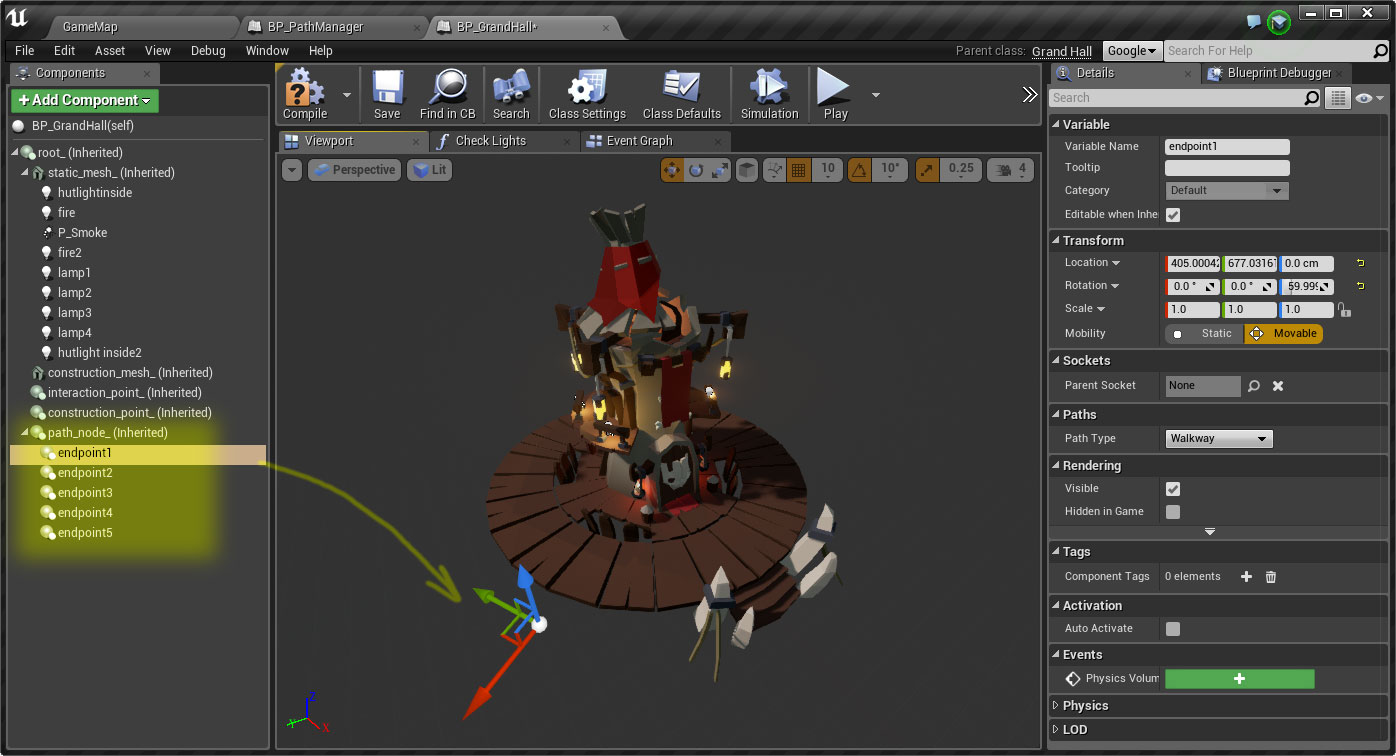
An example building blueprint showing the path node/endpoint setup
Connecting buildings
When the player decides to construct a new building in the village, they must place it down in a location that can be reached by goblin villagers. In this situation the pathing system dynamically plans potential path connections as the player moves the new building around the level, and displays if a given building site is valid or not based on whether path connections can be made. The system has to be fast enough to recompute new path connection plans every frame without noticeably lagging the game.
Each time a connection planning request is given to the PathManager, it starts by identifying candidate pairs of currently unused PathEndpoints, one on the building being placed, and another on some existing building in the village. The closest pairs of endpoints get investigated first, then more distant ones are considered until a viable plan is created (or some maximum number of attempts is exceeded).
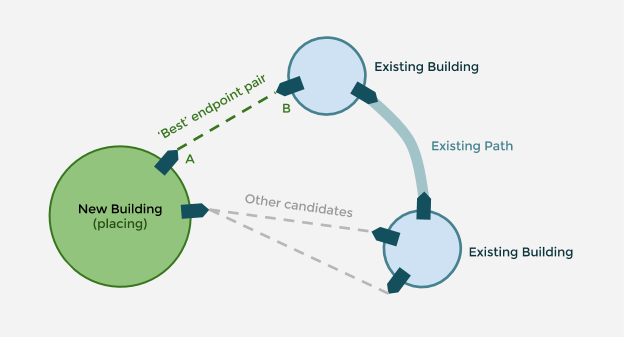
Path endpoint pairs are investigated in order of distance
To perform the actual connection planning between two endpoints, the PathManager queries Unreal’s Navigation subsystem. Normally you’d use this system for things like moving Pawns and Characters around in the level, but it turns out that the Navigation system is very flexible and can also be used for arbitrary pathfinding queries.
A NavigationQueryFilter is used when querying to exclude certain navigable areas from consideration, as we don’t want to create paths that cross over buildings or other paths. Building and pathway static meshes are marked with their own custom NavArea classes, and then the query filter prevents the navigation system from returning pathfinding results that would use those nav areas.

Constructing paths
Once we’ve successfully identified one or more potential routes between buildings, it’s time to actually construct the paths. This is done by taking a pathfinding result from the previous step and ‘drawing’ each linear section of the path (from one waypoint to the next) by spawning a sequence of PathSegment actors. Each PathSegment is attached to a ‘Next’ transform marker on its predecessor, with the very first segment being attached to the RootComponent of the path itself.
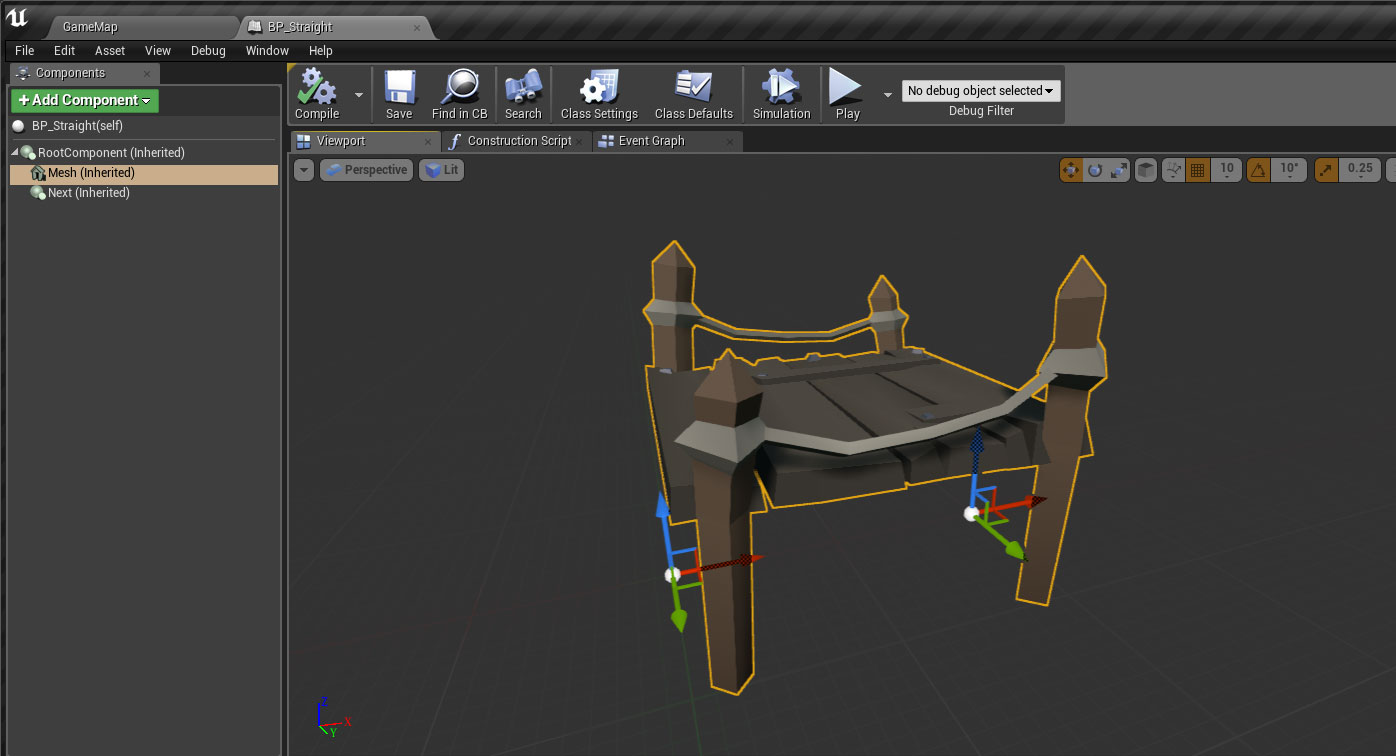
A straight section of path showing the origin and Next transforms.
A good portion of the path is generally made up of straight sections like the one above stacked end to end, but there are also a number of angled joining pieces that come into play if the path changes direction from one waypoint to the next, and other special segments such as landings that are used when the path joins with a building, or stairs that allow goblins to access the path midway between buildings. Each segment is defined with a Blueprint Actor class, as shown below. This allows us to introduce custom behavior on certain segments such as vertical ‘elevator towers’, which are needed for goblins to be able to traverse large elevation changes.
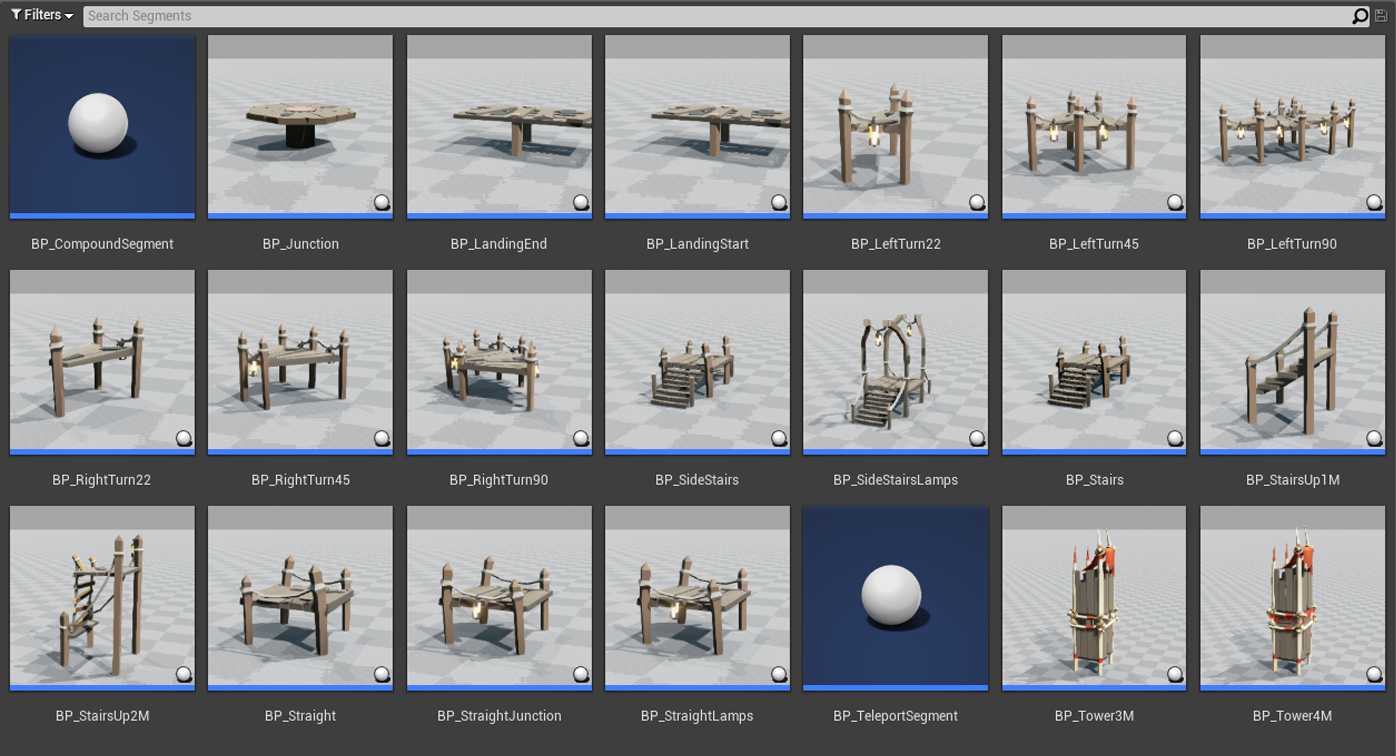
Some of the other segments used in the construction of pathways
Each path segment is configured with a simplified collision mesh and assigned a custom NavArea class that lowers the cost of travelling over paths significantly compared to walking over normal ground. This encourages goblins to preferentially select routes that make use of paths when travelling from one building to the next.
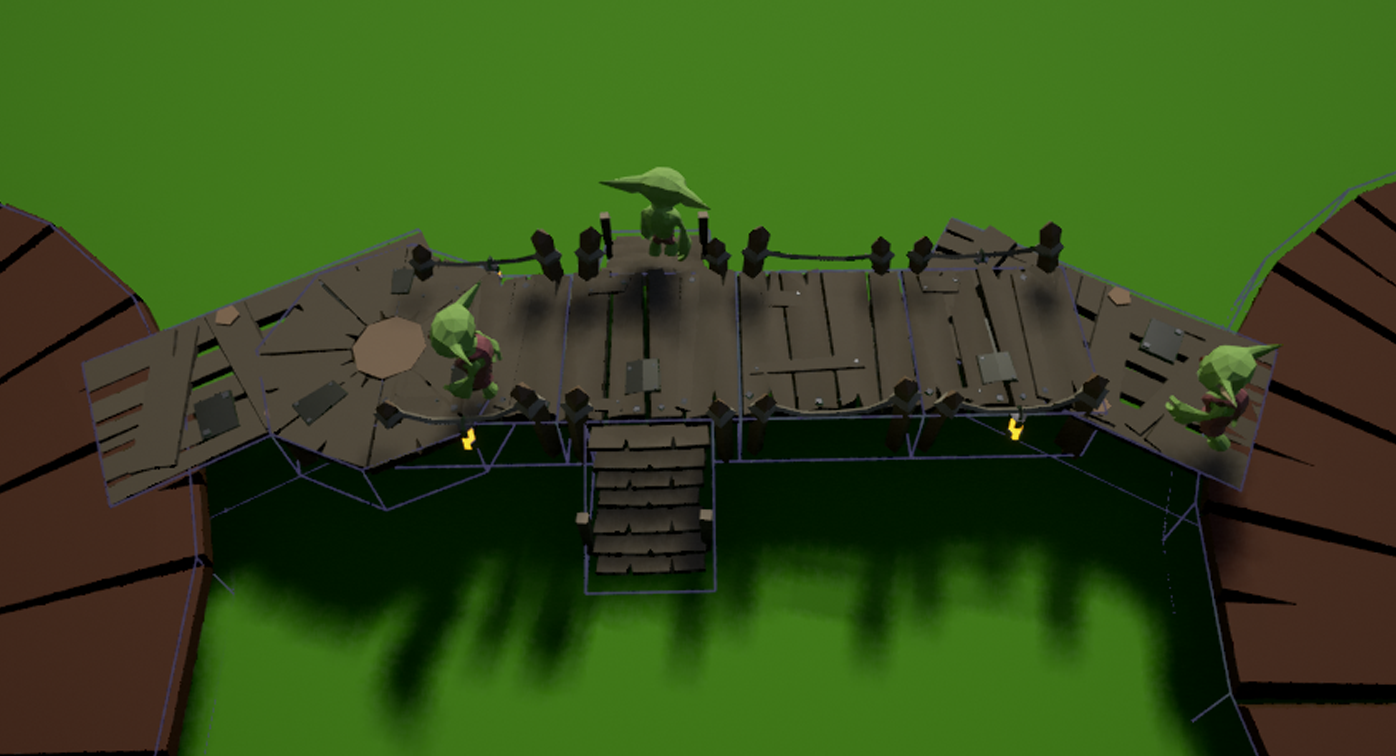
A completed path constructed from multiple segments
Obstacle avoidance
One of the nice things about using Unreal’s built-in navigation and pathfinding facilities is that paths will automatically be routed around obstacles, as long as those obstacles are configured with the appropriate collider setup. Unreal does a very nice job of selecting appropriate paths, and seems to give stable results as you move a building around looking for a suitable construction site during the placement phase.
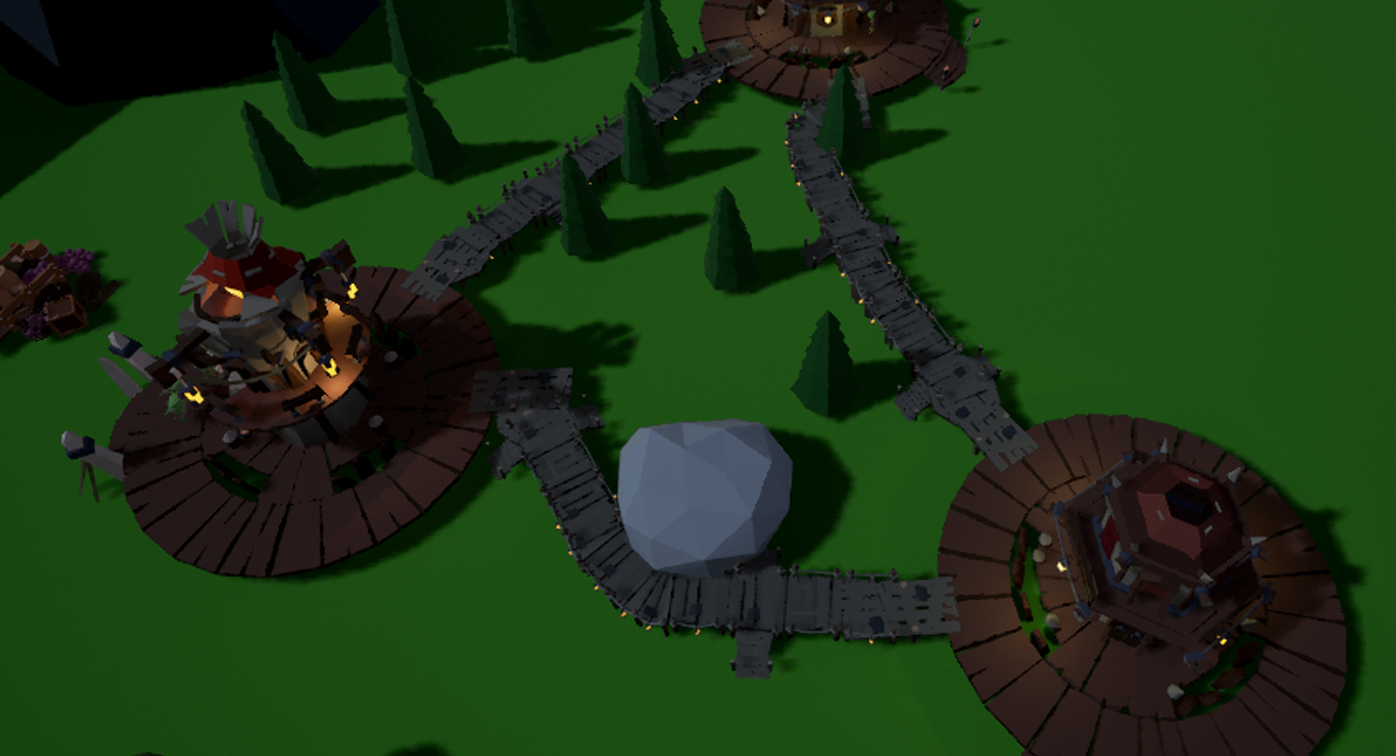
Some examples of paths being routed around various obstacles
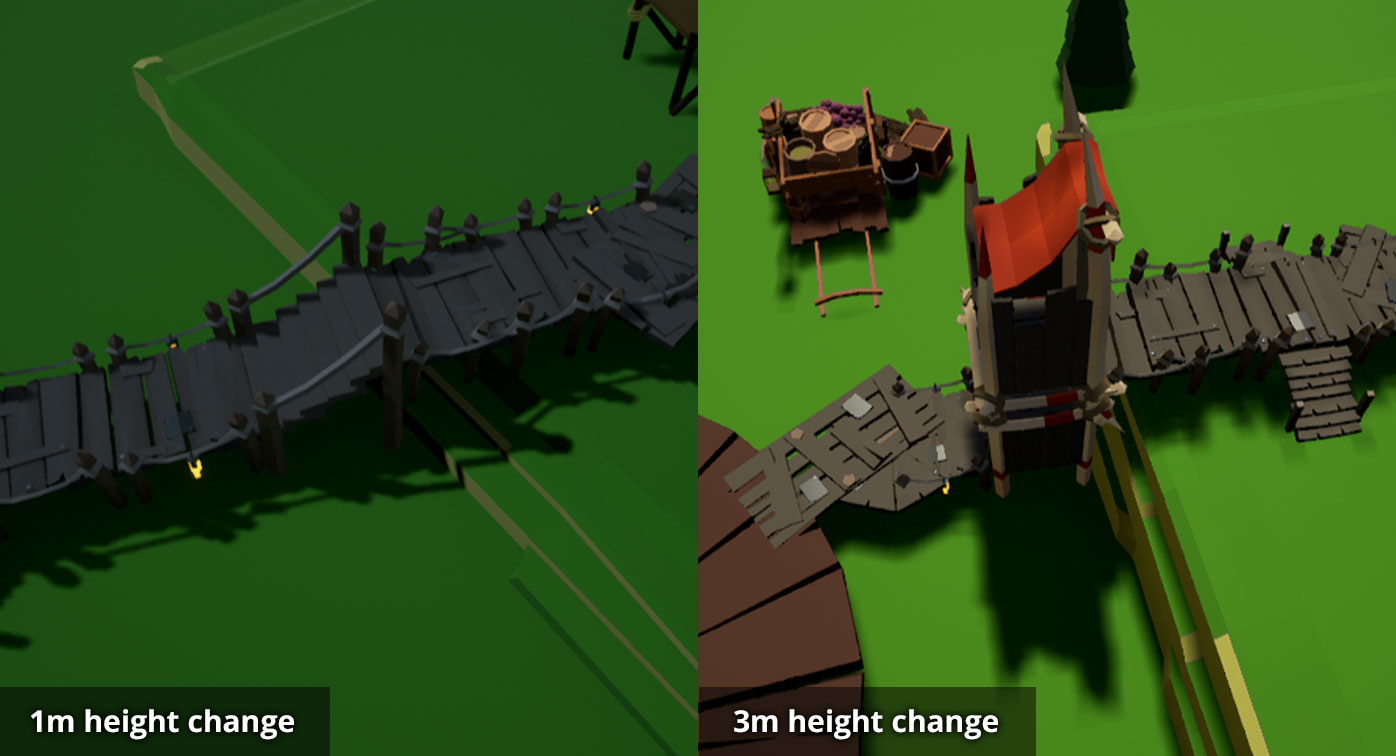
Elevation changes
To allow goblins to travel up and down over uneven terrain, we have implemented a system that detects height changes and spawns special segments such as Stairs, Ladders and Elevator Towers to allow the path to cover the gap. Since the Unreal navigation system won’t automatically generate a path that travels up a change in elevation, we detect where the terrain height changes along the proposed route and then split the path route into multiple ‘sub-path’ queries. The sub-paths are then joined up by stairs or one of the other bridging techniques based on the difference in height.
Future work
We now have a system in place that does a decent job of connecting the buildings into a basic village network, but there’s still a lot of tweaking and polish work to do as the game progresses. One major area of work is adding suspension bridges that can connect the second floors of adjacent buildings and also span valleys. Another idea is to add junctions that allow more organic forked paths to be formed as the village grows. It should be a lot of fun seeing how the system evolves into its final form over the coming months! Stay tuned for further updates..
Steve Salmond
@stevesalmond